|
An
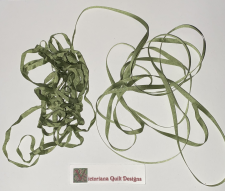
easy way to press the wrinkles out of silk ribbon, is to run it
across the steaming spout of a boiling kettle.
|
| |
|
| |
The
recommended length of thread, to use for hand stitching is 18"
- approximately from the tip of your fingers to your elbow.
That length, for two good reasons:
~ It allows you to pull the thread through the fabric, in one
pull.
~ Plus it keeps the thread stronger, without wearing it too thin,
as it looses fibres each time it's pulled through.
|
| |
|
| |
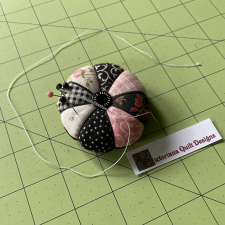
When
hand sewing or quilting, I like to pre-thread a bunch of needles
so I don't have to stop stitching to re-thread...........submitted
by Tina |
| |
|
|
Plastic
lids from margarine tubs and coffee cans make good sturdy templates.
Using cereal boxes works, too!...... submitted by Rosalee |
| |
|
| |
Thread has
a direction.
When hand stitching – to avoid spontaneous knots – thread your
needle from the loose end, coming off the spool and knot the end
you cut.
Also use 18” length or less, to avoid the deterioration that can
happen, when pulling longer lengths. |
| |
|
| |
For
needle-turn appliqué I like to use a wooden toothpick to
turn the seam allowance, as I find the wood grabs the fabric better
than the needle....Submitted by Kelly |
| |
|
| |
Useful
Information: The eye of a hand sewing needle is larger on one
side than the other. If you have trouble threading your needle,
try turning it around..............Submitted by Peggy |
| |
|
| |
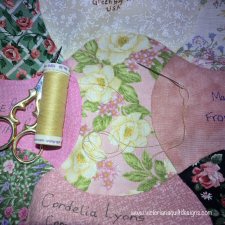
When
stitching a design to a background fabric use a thread colour
that matches the applique piece, not your background
fabric.............submitted by Heidi |
| |
|
| |
Print
the templates from printable pdf patterns onto cardstock for nice
instant templates........submitted by MaryAnne |
| |
|
| |
Organizing
your templates is easy if you get yourself an inexpensive photo
album with clear pages inside. It will keep all the templates
in their proper order, flat and ready to use........submitted
by Cathleen |
| |
|
| |
To
remove wrinkles from ribbon, gently run it over the steam of a
kettle or through a curling iron.......submitted by Rita |
| |
|
| |
I
had a small lipstick case with a mirror for my purse. I replaced
the mirror with a magnetic strip and now use it as a thread &
needle case for my take-along sewng..........submitted by Terri |
| |
|
| |
A
bobbin of thread within a dental floss container makes a handy
travel thread holder using the 'cutter' to cut your thread.......submitted
by Sylvia |
| |
|
| |
I've
made up a portable work table that I can easily take with me and
use for some of my hand sewing quilt projects.
In a clipboard I stack (bottom-up): Cutting Mat (reused/cut to
fit from larger damaged mat), a sheet of fine sandpaper and then
a rectangle of cotton batting (scrap piece, or a sheet of felt
would also work) as a mini design board.
And to top it off I clip my pattern and fabric patches (in an
envelope). I then tuck the edge of an eye glass case that I keep
a small rotary cutter and ruler, mechanical pencil, needle, thread
& small scissors in. This 'station' gives me all the surfaces
needed to work on my blocks, anywhere.........submitted by
Theresa |
| |
|
| |
A
Needle-turn appliqué pattern placement technique I recommend
is using the thinnest non-woven interfacing you can find. Trace
the
block onto the non-woven fabric. Baste it to the top of your background
block. Put the appliqué piece under the pattern to place
it. After you have placed the piece, you roll up interfacing and
pin it at the top of the block. To place the next piece, unpin
the pattern and roll down, placing the next piece, roll up and
pin again and repeat until the block is finished.......submitted
by Karol |
| |
|
| |
When
travelling I cut a 3" square of batting to take with me.
I put the snips of thread that I cut off on this piece of batting.
They stick to it really well even if the batting is knocked onto
the floor.......submitted by Elizabeth |
| |
|
| |
When
fusing adhesive to my fabric I use an empty heated glue gun. You
will be surprised at the result.......submitted by Nancy |
| |
|
| |
I
pin a small square of thin batting on the arm of my recliner when
I watch TV while hand sewing or quilting. I use it to collect
threads. Sounds simple; works great.......submitted by Jeanne |
| |
|
| |
Most
radiology departments in hospitals and clinics end up with clear
film. I use this film for templates for my quilt patterns. I use
a ultra fine sharpie marker to draw or trace the lines on the
xray film. It works great!......submitted by Betsy |
| |
|
| |
Pre-shrink
your freezer paper with an iron on your ironing board, before
you draw your patterns onto it for more accurate templates......submitted
by Barbara |
| |
|
| |
When
you have bits of threads left over, from the end of bobbins or
spools, wind them around a scrap of cardboard to keep for basting
your appliqué shapes......submitted by Rose |
| |
|
|
Print
the template onto an 8½" x 11" sheet of sticky
back label paper. Cover it with clear contact paper. Peel off
the label backing and stick onto that heavy plastic blister pack
that inkjet cartridges come in, or something similar. Cut out
with kitchen scissors. My edges are usually nice and smooth, but
you could use an emery board to take off any rough spots. If you
need to mark any matching dots, or seam allowance points on your
template, you can take a push pin and put it right through the
plastic at the point and rotate it around a little to make the
hole large enough to fit a marking pencil in. It works great!.........submitted
by Donna |
| |
|
|
When
preparing my patches for take along sewing, I take one stitch,
through a stack of patches, that go together for a block. I leave
long thread tails, to wrap for security.......submitted by
Penny |
| |
|
|
To
remove the fusible interfacing from the bottom of your iron, dampened
a washcloth, sprinkle baking soda on it so all the baking soda
is moist and rubbed your iron on it. Wipe the iron with a clean,
damp cloth before using again, making sure no baking soda is left
in the steam vents. This works perfectly! This is inexpensive
& environmentally friendly......submitted by Ashley |
| |
|
|
When
trying to press the seam allowance on appliqué pieces, I use an
"orange stick" (the kind you use to push your cuticles
back). I prefer the ones you find at beauty supply houses
because they are longer, but the short ones work
just as well. Simply
place the rounded end at the pressing line & press your fabric.
These sticks are pliable, easy to work with and do not burn because
they are wood. They are especially good when working on
tiny pieces.....Submitted by Kathy |
| |
|
|
Thread
your needle from the thread end, and not the end cut off the spool.
This prevents your thread from "knotting", as you sew.
Thread has a direction. |
| |
|