Hi!
I'm Mel from Mel's
Own Place!
I found
out years ago that I am most happy when I can CREATE!
I LOVE hand work and wish I had more time to indulge!
I always have at least one hand project ready to grab
when I'm going on a trip, waiting for my son at school
or at the hair stylist's.
I'm excited
to share one of my most useful tutorials, A Very Small
Needle Case.
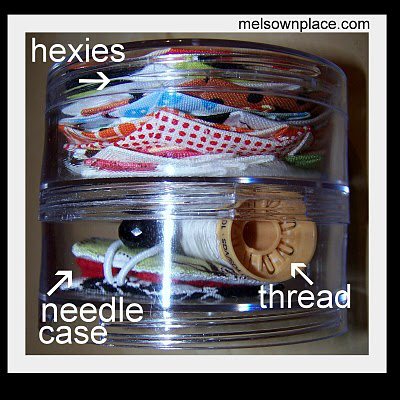
I wanted
a needle case that was small so it could fit into my
hexagon storage thingy.
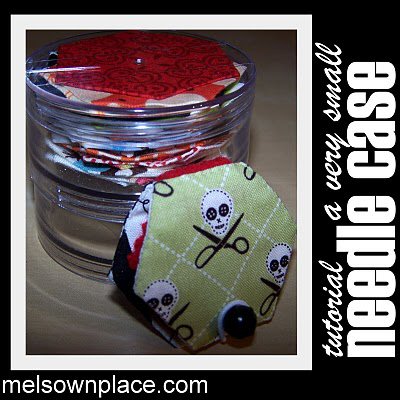
I love the
small size and thought I'd share how I made mine just
in case you find yourself needing a case for just a
couple of needles!
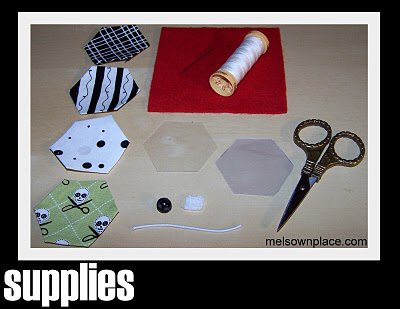

~Four 1"
hexagons cut from fabric
[for a real good way to prep your hexies, see this
tute]
~ Piece of Wool - 3" x 3"
~Tiny piece of stabilizer - really, no bigger than ½"
square (thins could even be a couple extra layers of
fabric, a piece of batting or a piece of wool.)
~Template Plastic - 3" x 6"
~Button with a shaft (see pic below)
~Elastic Cording - 2"
~Needle
~Scissors
~Thread
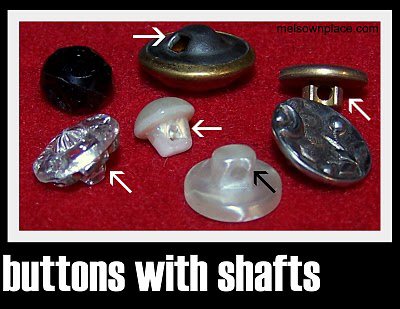
For this
project, buttons with shafts will provide the closure
for our needle case. The elastic cording will fit around
the height of the shaft, keeping the front and back
cover to stay together.
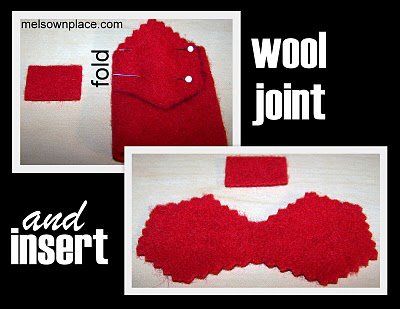
Cut:
From
wool:
Cut a piece 1" x 3/4" this will be your 'joining'
piece.
Fold remainder of wool in half.
With one of the six sides on the fold, trace your hexagon
onto one side and cut out.
This is where you will keep your needles or pins.
I cut my wool shape 1/4" smaller all around, with
pinking sheers.
NOTE: Some
wool pieces are fluffier than others. I wish I would
have considered this as my insert turned out thicker
than I had wanted.
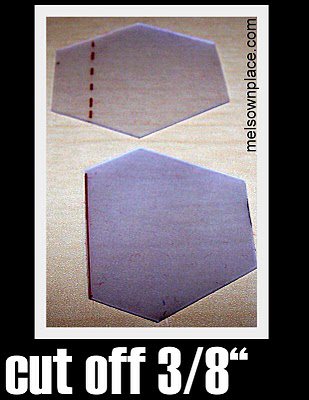
From
template plastic:
Cut two hexagons from the template plastic, but make
them 1/4" smaller than your fabric pieces.
I just cut 1/8" from all six sides.
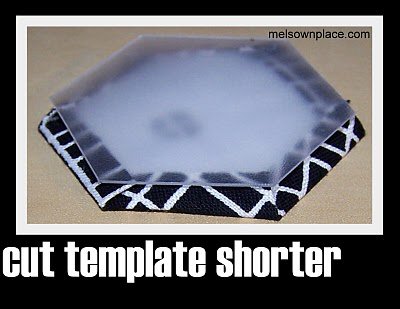
Now measure
and mark 3/8" from just one side and cut. This
will make allowance for the joint piece to butt up against
so there isn't too much bulk.
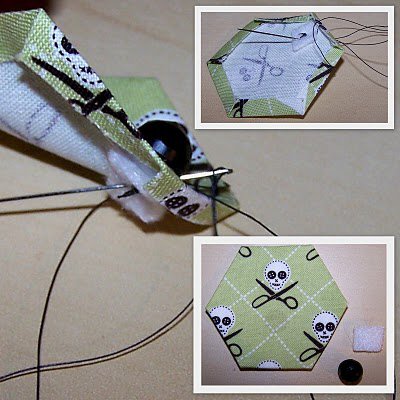
Choose which
fabric will be the front of your case and sew a button
1/8" to 1/4" from the edge.
Put the
small amount of stabilizer behind your button (on the
wrong side of the fabric) to add some, well, stability
to the stress your button will receive by being the
closure of your case.
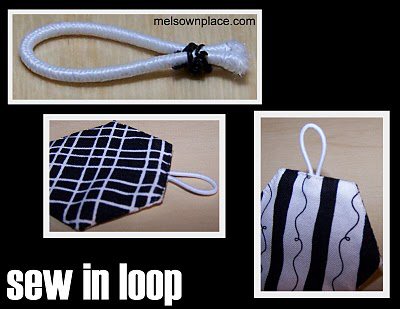
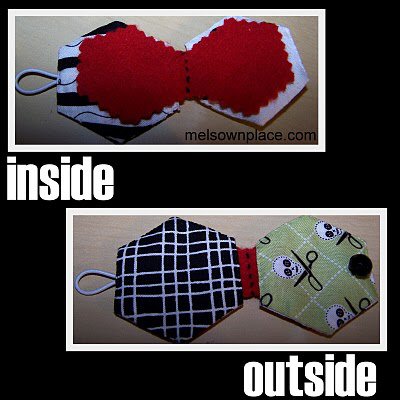
Which pieces
will make up the back cover? Make a loop with your elastic
cord and sew it between these two pieces.
Insert the
wool piece that will join the front and back cover by
butting it up against the template plastic.
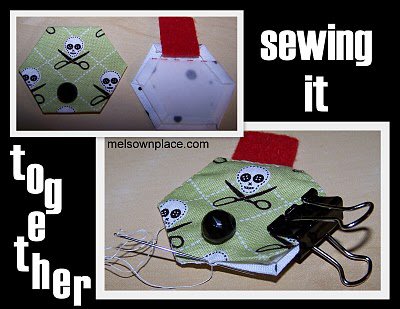
To join
the front and back covers of your case, whip stitch
two hexies together for each cover. Use a clip to keep
the plastic piece and joint piece in place as you sew.
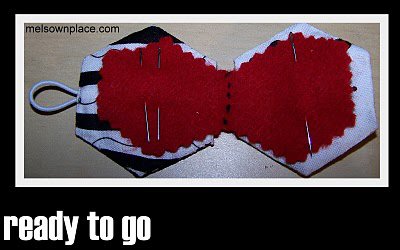
Now stitch
your wool piece to the wool joint from the inside. I
used a very simple stitch with embroidery floss.
Fill your
needle case with needles and you're ready to sew and
go!
Now I need
to figure out how to fit a can of Diet Coke in here!

Variations:
~You could
use wool for your 'cover' hexies instead of cotton fabric
~You could use Velcro or a snap instead of a button
for a closure
~If you don't have plastic, you could use cardboard
from a cereal box
~Instead of whip stitching to
join two hexagons, you could use a blanket stitch
So,
if you make one of these cuties, will you please email
me a pic or link to your creation? melissa266{at}gmail{dot}com
Hope you find this project fun and useful!
Mel
~~~
Your
hex needle case is the perfect one to use for our take-along
projects...Thanks Mel!
Be sure
to visit Mel's site here.