 |
Below you will find how-tos for these Silk Ribbon Embroidery Stitches:
|
||||||||||||||||||
|
Any instructions with [brackets], refers you to the Technique Page in the Library of this site for printable free how-tos. ~If
your project will be washed you should prewash your ribbons.
~Use an embroidery needle with an eye large enough to fit the ribbon.
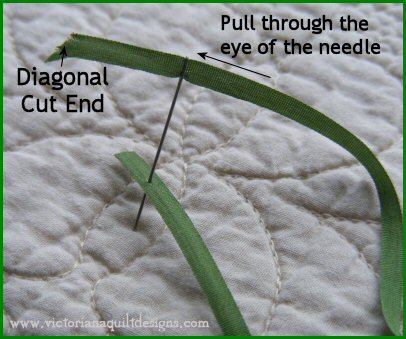
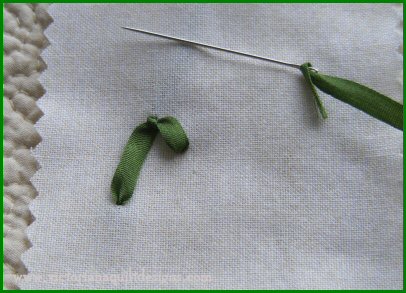
~Pierce
the other end of the ribbon with the needle, leaving a ½"
tail.
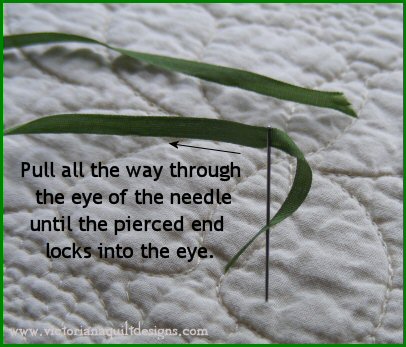
~Pull the ribbon all the way through, until the pierced end locks into the eye of the needle (see in the picture below).
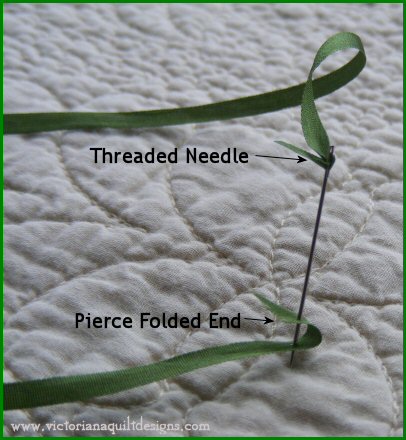
~Make a fold at the end of the ribbon and pierce it with a the ribbon-threaded needle.
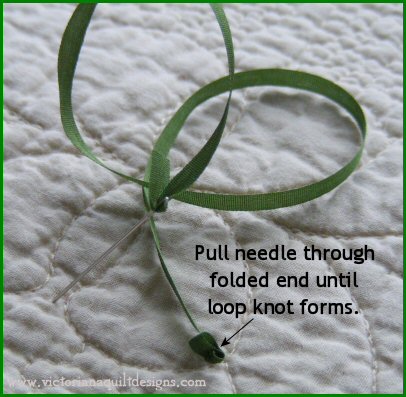
~Gently pull the needle and ribbon all the way through the folded end, until a loop knot forms.
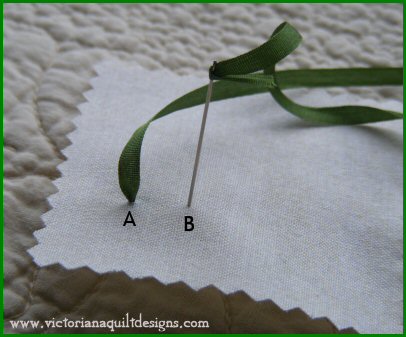
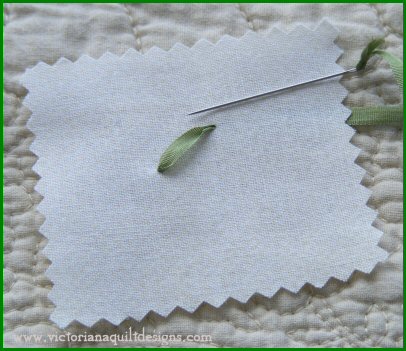
~Bring your needle up at A and gently pull the ribbon through the fabric.
~Go back down at B, which can be any length you need for the stitch.
~Pull the ribbon all the way through, until it lays nicely flat.
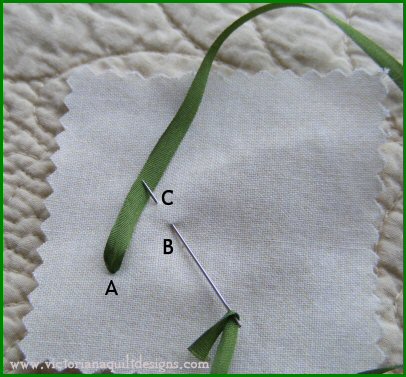
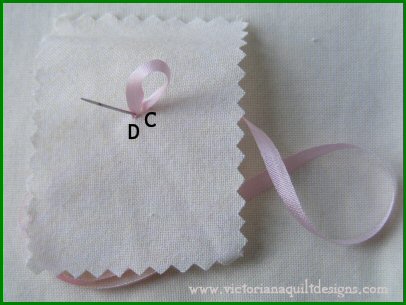
~Bring your needle up at A and gently pull the ribbon through the fabric.
~Go back down at B, and up at C, which should be the bottom edge of the bend you will create.
~Then stitch over the ribbon, going back down through the fabric at D.
~Adjust the ribbons until you are please with the effect.
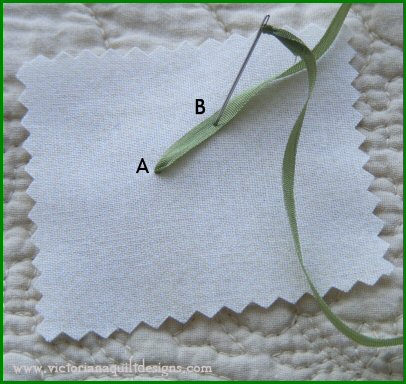
~Bring your needle up at A and gently pull the ribbon through the fabric.
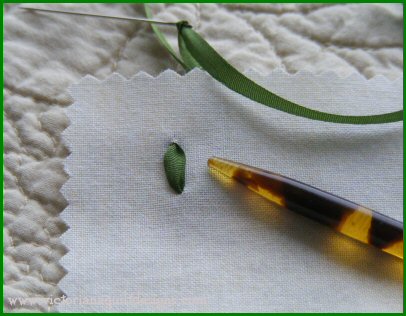
~With the ribbon laying flat on the fabric, pierce the center of the ribbon at B, gently pulling the ribbon through, until the tip of the ribbon curls into a point.
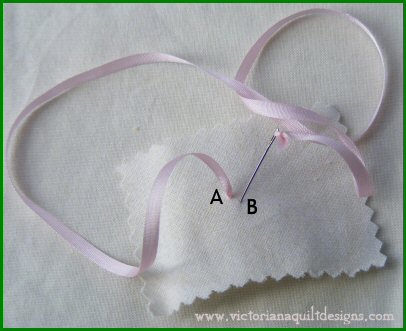
~Bring your needle up at A and gently pull the ribbon through the fabric.
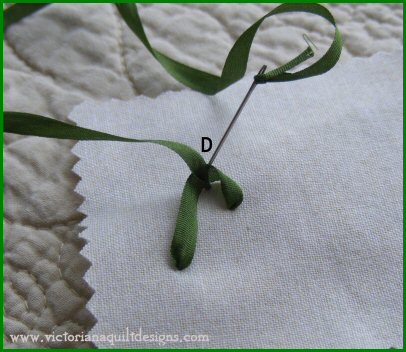
~Go back down at B, slightly ahead of A. Gently pull the ribbon through, holding the loop in place and leaving enough ribbon above the fabric for the size of loop you require. Using a laying tool is helpful in shaping your loops.
~Carefully come back up between A & B, piercing the center of the ribbon at B. Gently pull the ribbon through. Go back down at D to anchor the loop. Tip: If you need the loop to lay down, you can use a tack stitch, using matching thread, through the back of the loop.
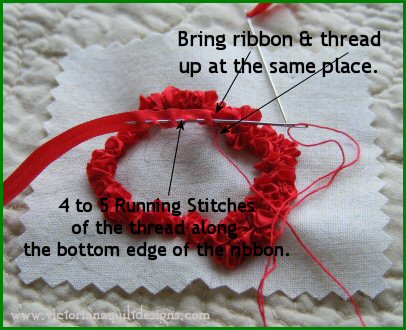
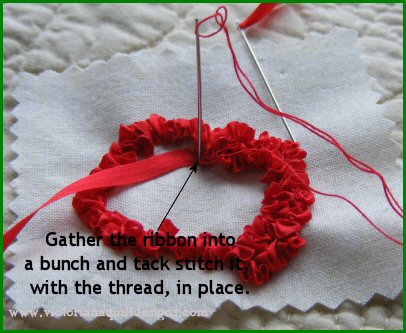
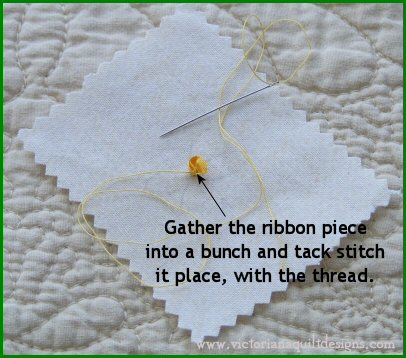
~Bring the ribbon and matching thread (on two seperate needles) up at
the same place.
~With the matching thread run 4 to 5 small gathering stitches [Stitches~ #3c] along the bottom edge of the ribbon, from right to left.
~Gather
the ribbon into a small bunch, and tack stitch [Stitches~
#2] it
with the thread, in place. Continue gathering & tacking.
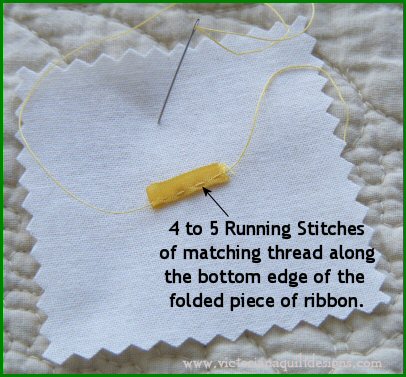
~Fold a piece of ribbon (about 1") in half.
~With the matching thread run 4 to 5 small gathering stitches [Stitches~ #3c] along the bottom edge of the folded ribbon.
~Gather the ribbon into a small bunch, and tack stitch [Stitches~ #2] it with the thread, in place.
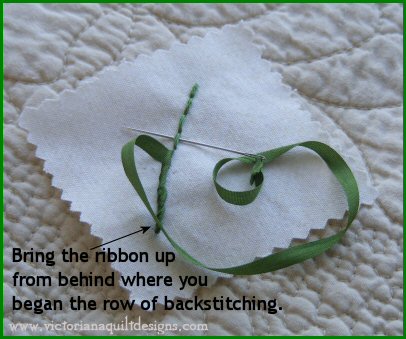
~Use 3 strands of matching embroidery floss.
~Bring the ribbon up from behind where the row of backstitches begins.
~Wrap
each stitch with ribbon by sliding the needle under the backstitch,
from right to left, and pulling the ribbon through, guiding it to lay
flat.
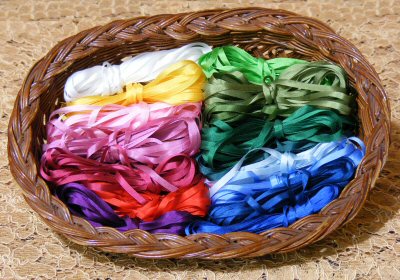
4mm Silk Ribbon Package
5
yards each in 16 different colours.
|
|||||||||||||||||||
|
Content & Graphics © 2001~ Victoriana Quilt Designs All rights reserved. Unauthorized use is strictly prohibited.
|