 |
|
||||||
|
Free
Block of the Month
Of
Special Note: I'm currently working on my Bits & Bobs collage quilt.
June Embroidery & Embellishing Inspiration
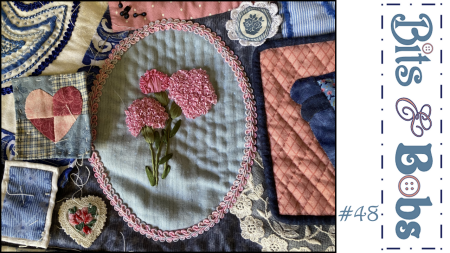
In the Forty-eighth Bits & Bobs video I stitched my Carnations Silk Ribbon Embroidery (SRE) Block to the quilt. Click the button above to watch it. ~~~~~
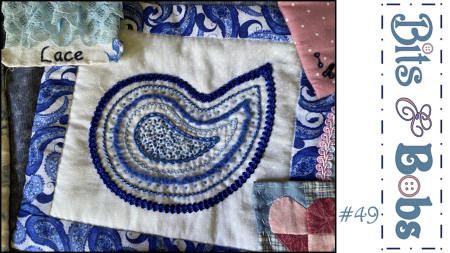
In the Forty-ninth
Bits & Bobs video I show the finished Carnations Silk Ribbon Embroidered
block - so pretty! Click the button above to watch it. ~~~~~
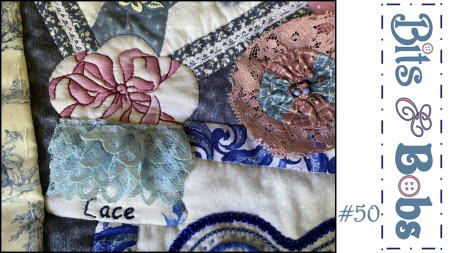
In the Fiftieth Bits & Bobs video I complete the Lace Card element, which is the last larger piece to be added to this quilt. Click the button above to watch it. ~~~~~
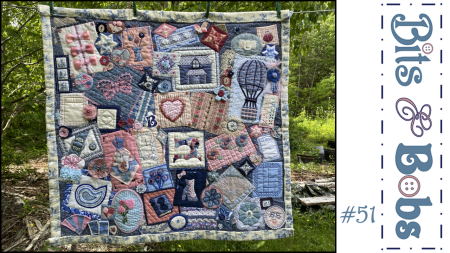
In the Fifty-First
Bits & Bobs video I'm sharing the whole quilt, as it is today. Click the button above to watch it.
Sign Up for the newsletter to receive the email notice when there's more. The information you send is for our files only! ~~~
|
|||||||
~Members Only~
Content & Graphics © 2001~ Victoriana Quilt Designs All rights reserved. Unauthorized use is strictly prohibited. Welcome | Victoriana Quilters | Block of the Month | Pattern Page | Library | Membership Schoolhouse | Gallery | Sharing | Feedback & Links | Card Shoppe
|