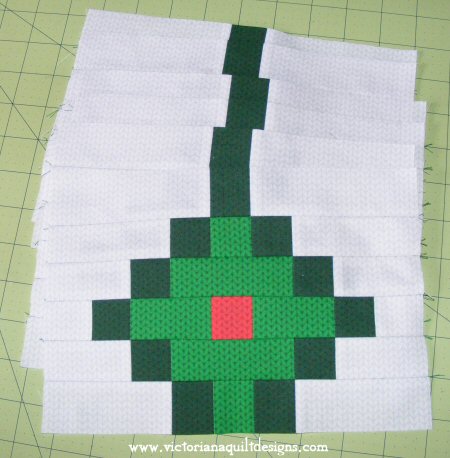
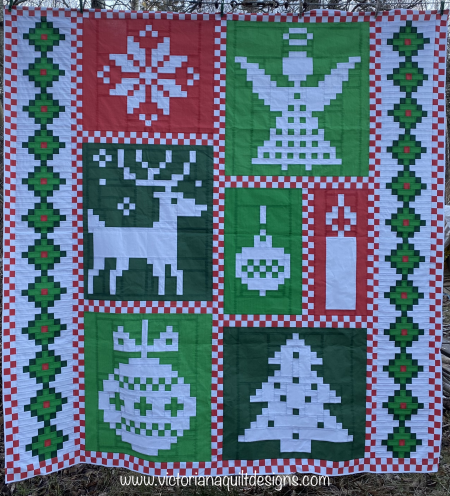
Click here to get to the Christmas Sweater Quilt Main Page.

~~~

Important Note: Please read all the tips for piecing,
I share on the main page here.

~~~


You're almost done!

Add the final borders as follows:

~Version 1~

1. Sew [Machine Piecing] two side borders together, using 12 side border blocks each, into a column.
   ~Match the seams (two matches on each seam).

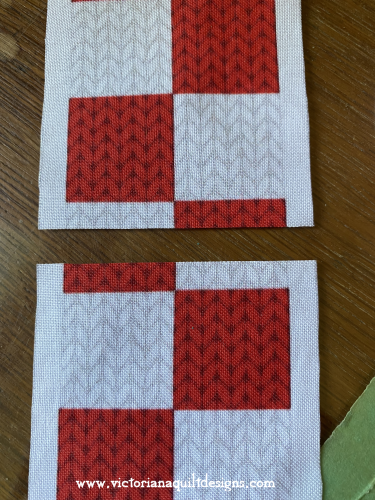
Side Border Blocks

2. Using 144 of the remaining 4-Patch units, you made when you the quilt center was sewn together, lay out four vertical borders.
- Begin with the red at the top left, using 36 4-Patch units, for two of them.
- Begin with the white at the top left, using 36 4-Patch units, for two of them.
Use the picture of the quilt below, as a guide.

3. Sew [Machine 
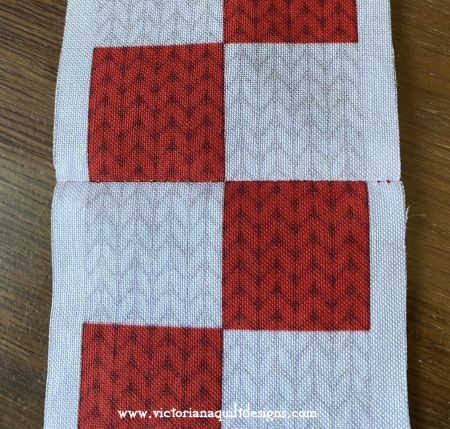
Piecing] the units together, matching the seams.
Note: You'll find reminder tips, in a previous tutorial page here, when you made the vertical sashing for the center of the quilt.

4. Sew [Machine Piecing] one long check border, to either side of a side border column.
Put the white square at the top left, on the left side and the red square at the top left, on the right side of the center blocks, for the left side border.
Put the red square at the top left, on the left side and the white square at the top left, on the right side of the center blocks, for the right side border.
Use the picture as a guide.
Press the seams together, toward the center blocks.

5. Sew [Machine Piecing] a side border, to each side of the center quilt, matching the seams.
Note: You'll find reminder tips, in a previous tutorial page here, when you made the vertical sashing for the center of the quilt.

6. Using the 74 remaining 4-Patch units, you made when you the quilt center was sewn together, lay out two horizontal borders.
- Begin with the white at the top left, using 37 4-Patch units, for both of them.
Use the picture of the quilt below, as a guide.

Christmas Sweater Quilt

7. Sew [Machine Piecing] one long horizontal check border, to the top and bottom of the quilt.
Put the white square at the top left.
Use the picture as a guide.
Press the seams together, toward the center blocks.


~~~~~

~Version 2~

1. Sew [Machine Piecing] two side borders together, using 12 side border blocks each, into a column.
   ~Match the seams (two matches on each seam).

Side Border Blocks

2. Cut the remaining border fabrics, for your size quilt, as instructed  [Rotary Cutting~ #F]:

Note: The pre-printed border fabric can be cut apart using scissors, along the grey line, that divides them.

- 4~2½" x 72½" (4~3½" x 108½") vertical borders, to go on either side of the two columns of side borders.
Note: If using pre-printed border fabric -
Put the white square at the top left, on the left side and the red square at the top left, on the right side of the center blocks, for the left side border.
Put the red square at the top left, on the left side and the white square at the top left, on the right side of the center blocks, for the right side border.
Use the picture, below, as a guide.

Join fabrics to make it long enough.

Joining Pre-Printed Check Border Before

Pay attention to the colour of the squares, where you join them.

Joining Pre-Printed Check Border After

3. Sew [Machine Piecing] one long check border, to either side of a side border column, paying attention to placement of the checks.
Use the picture as a guide.
Press the seams together, toward the outer borders.

4. Sew [Machine Piecing] a side border, to each side of the center quilt, matching the seams.
Note: You'll find reminder tips, in a previous tutorial page here.

5. Cut the top & bottom border fabrics, for your size quilt, as instructed
- 2~2½" x 74½" (2~3½" x 111½") horizontal borders.
Note: If using pre-printed border fabric -
Put the white square at the top left of both of them.

Use the picture of the quilt below, as a guide.

Christmas Sweater Quilt

6. Sew [Machine Piecing] one long horizontal check border, to the top and bottom of the quilt.
Put the white square at the top left.
Use the picture as a guide.
Press the seams together, toward the center blocks.


Content & Graphics © 2001~ Victoriana Quilt Designs

All rights reserved. Unauthorized use is strictly prohibited.

Welcome | Victoriana Quilters | Block of the Month | Pattern Page | Library | Membership

 Schoolhouse | Gallery | Sharing | Feedback & Links