 |
|
|
|
Any instructions with [brackets], refers you to the Technique Page in the Library of this site for printable free how-tos.
~Santa's Rising Sun Quilt~
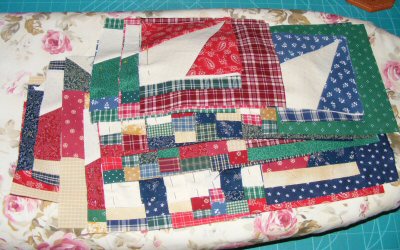
Over on my Facebook page, when I posted this lovely picture 'Quilting Santa', a conversation began about what block was used in Santa's quilt. The closest design I could find was one called 'Rising Sun', though it uses wedges for the arcs. I offered to figure out the design, and when my block was approved, I put together this tutorial so you can also make this lovely quilt! Though the whole quilt is not shown in the painting, I've designed my quilt on a 6 by 6 block size, which means we need 36 blocks total. [I have also designed a fun finish, which is available to members.]
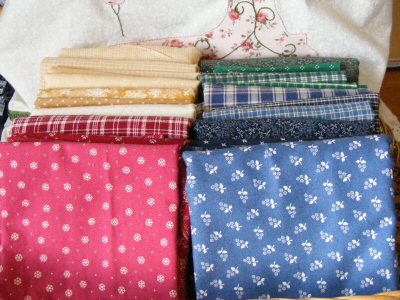
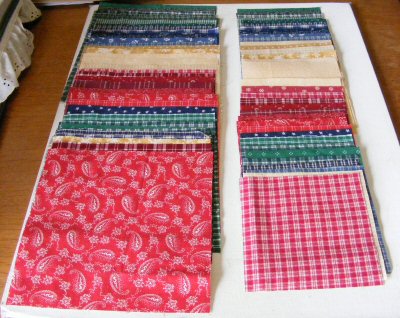
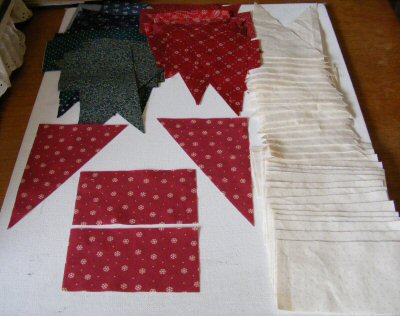
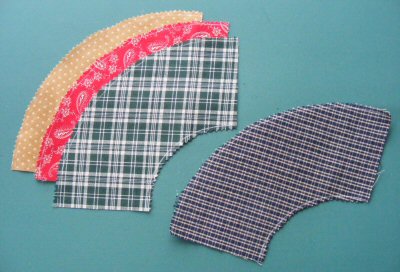
I selected all of my fabrics from my stash...in the 'country colours' that were used. I have about 7 fabrics in each colour (blue, red, green, gold/cream) and I also planned to used one basic for the bulk of the cream backgrounds. Note the fabrics are one colour with a neutral simple design or plaid. [Design Note: I used my plaids for the arcs only, as I didn't want the directional issue to distract the eye from the points.]
~You Will Need for Each Block~
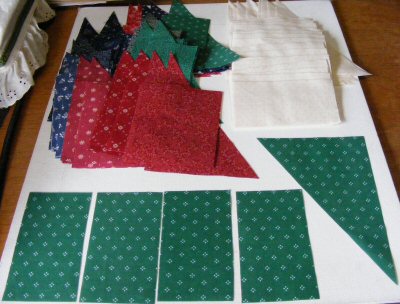
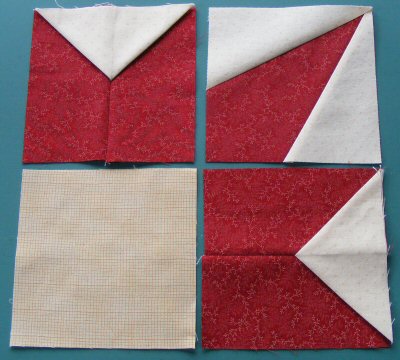
Cut [Rotary
Cutting] one 5" square, and one 7½" square
(this large one does not need to be cut the 'exact' measurement).
From the same fabric
cut 4~2¾" x 5" rectangles, and one 5" x 7½"
rectangle (this 'C Patch' rectangle will be give you two patches after
cutting it diaongally ~ see below). I cut a batch of these from the
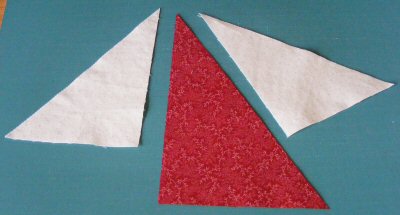
background fabric I used. Cut the C Patch large rectangles in the direction shown - corner to corner.
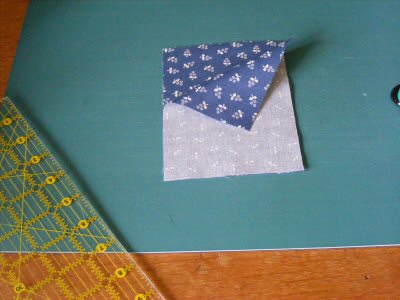
From the same fabric
cut 2~2¾" x 5" rectangles, and 2~4¼" x
6" rectangles (these are your A Patch and B Patch rectangles, and
will give you two patches each after cutting them diaongally ~ see below).
I cut a batch of these from the background fabric I used. Place the smaller rectangles right sides together.
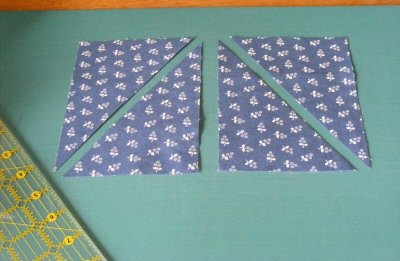
Cut the A Patch and B Patch smaller rectangles in the direction shown - corner to corner.
The A Patch is on
the left and the B Patch is on the right.
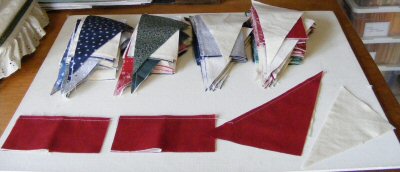
Group one Set A together with one Set B and chain piece them together (as instructed below), clipping between each set of three units as you sew, and placing together with the remaining unsewn B Patch.
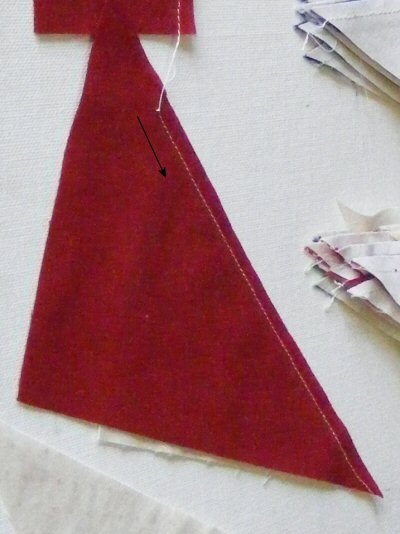
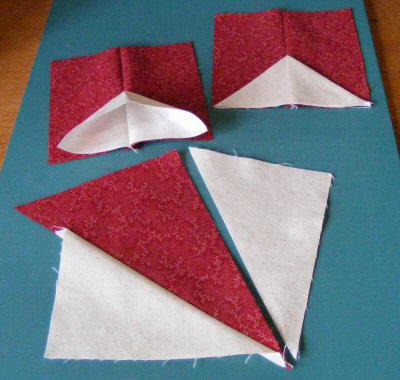
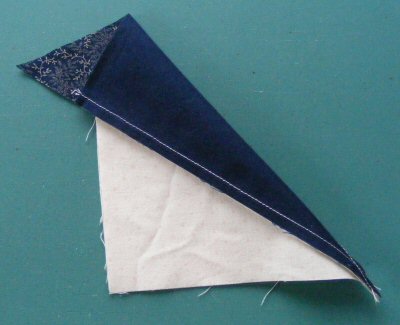
1. To make the Wedge unit, align the two bias edges and points of the A Patch triangle (the one on the left) and C Patch. Placing the C Patch on top, start sewing [Machine Piecing Basics] along the bias edge in the direction of the arrow, towards the point.
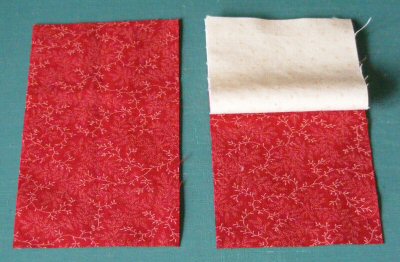
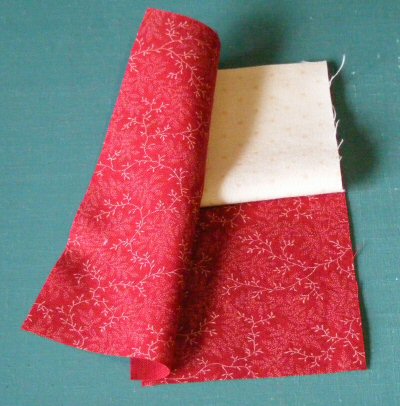
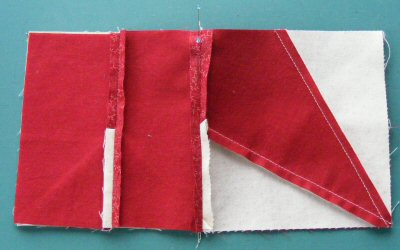
2. Fold the two 2¾" x 5" rectangles from Set B, in half with wrong sides together. Pair each with the 2~2¾" x 5" rectangles from Set A.
3. Place a Set A rectangle on each side of the folded Set B one, with right sides together and with all of the edges aligned at the top. Sew down one of the long sides. You will be making two of these 'Tall Goose' units for each block.
4. Carefully press [Pressing-#1] the Wedge A Patch open with the seam allowances together, towards A Patch.
For both of the Tall Geese units, press the back seam open and then turn over and open the folded fabric into a triangle, pinching the corners together, aligning the slight fold with the center seam plus the tips with the patch corners, and gently press. [Note: The quilting will hold down the loose folded edges, but feel free to applique if you prefer.]
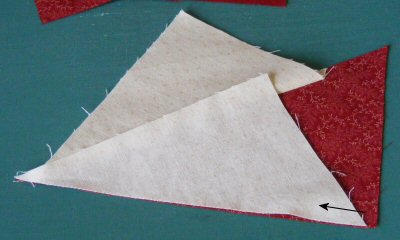
5. Align the bias edge and point of the triangle B Patch with the remaining edge of the triangle C Patch. Placing the B Patch on top, start sewing along the bias edge in the direction of the arrow, towards the point.
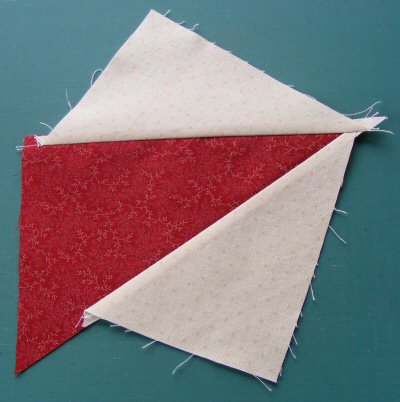
Carefully press B Patch open with the seam allowances together, towards B Patch.
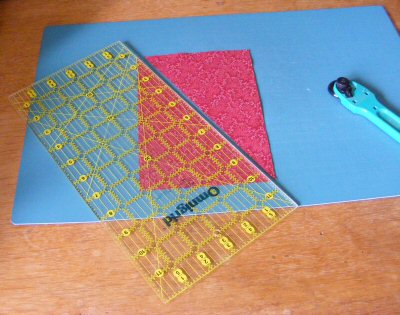
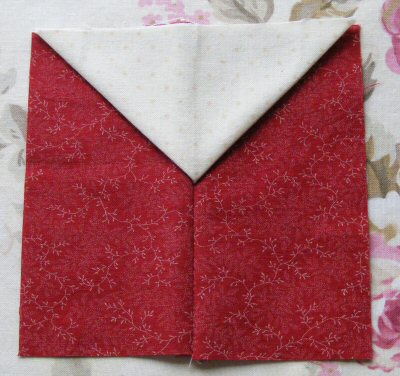
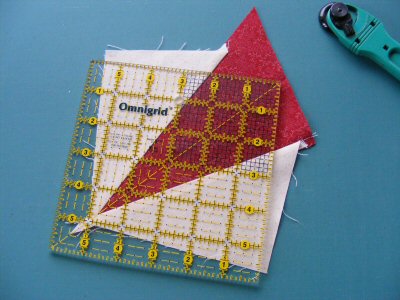
6. Fold the Wedge unit in half and finger press the 'center point' of the large center triangle.
Trim the Wedge unit by aligning the ruler as shown. The 4¾" mark should be at the point where the two 'wings' meet, and the top right corner at the 'center point' fold. Trim up the right side and across the top.
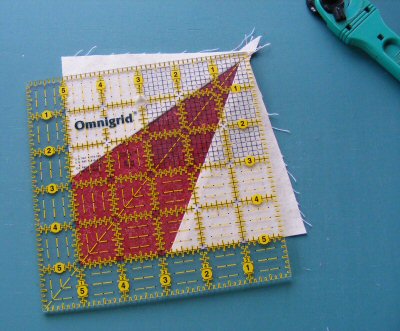
Turn the unit around and align the ruler along the cut edges at 5" and trim the remaining two edges.
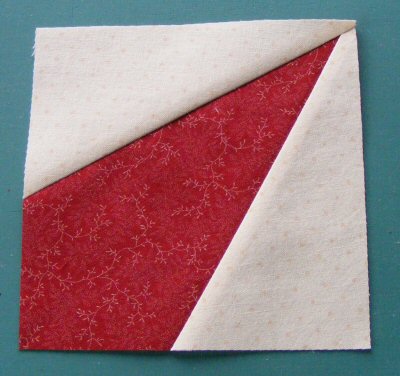
The Wedge units look like this:
7. Group a large and small square with each set of 2 Tall Goose units and a Wedge for each of your 36 blocks. Try making each block completely different.
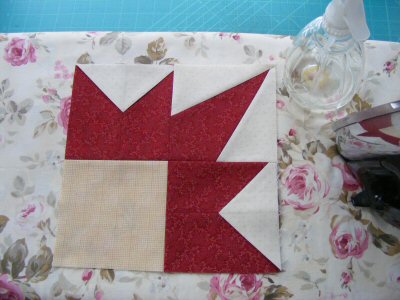
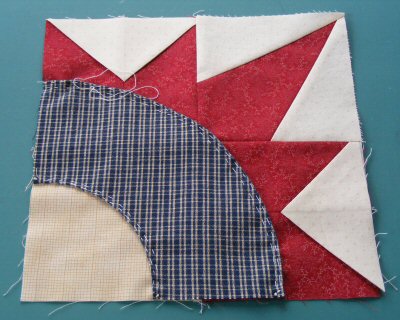
8. Arrange the two Tall Goose units, the Wedge and the 5" square as shown. Sew them into pairs. Press the seams open.
9. Place the top half of the block rights sides together with the bottom half, matching the seams. *Perpendicular Pinning Tip: Place a pin in the seam of both the blocks you are joining. Don't anchor it. Hold the pin perpendicular (90*) with your first two fingers (underneath) and your thumb on top. Now place an anchor pin (going in at an angle) beside it. Remove the perpendicular. This pinning method keeps the blocks from shifting out of place.
Sew the two halves together.
10. Press [Pressing-#3] the seam allowances open, and then give the block a mist & dry press which gives it a good flat crisp finish.
11. Appliqué the arc onto the block where illustrated using the method you like best.
Request the Santa's Quilt Arc Template here
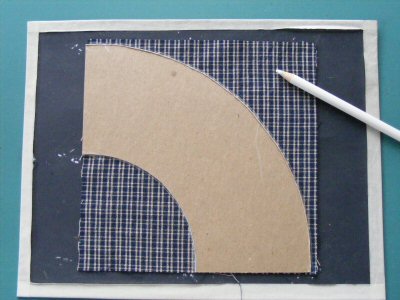
My favourite method is Basting Applique, and the following is how you do it. 12. Make a template
[Cardboard Templates-For Piecing] for the arc shape.
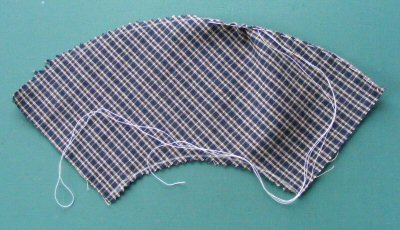
13. Finger press the seam allowance over to the back of the shape (except the straight edges) and baste in place [Stitches-#3c].
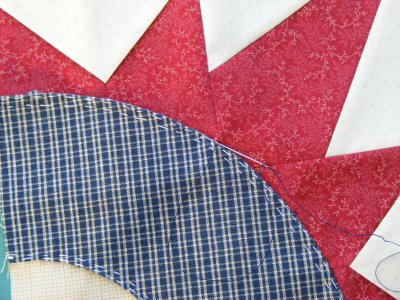
14. Pin the basted arc to the block and then baste into place, as shown.
15. Using 18" of thread that matches the arc, blind-stitch [Stitches-#1] the two arc edges to the block. Remove the basting thread when complete.
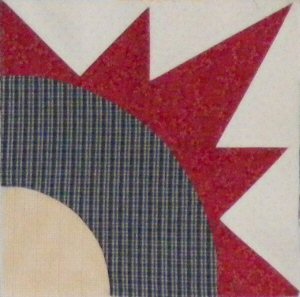
Santa's Rising Sun Block (9" x 9" finished size)
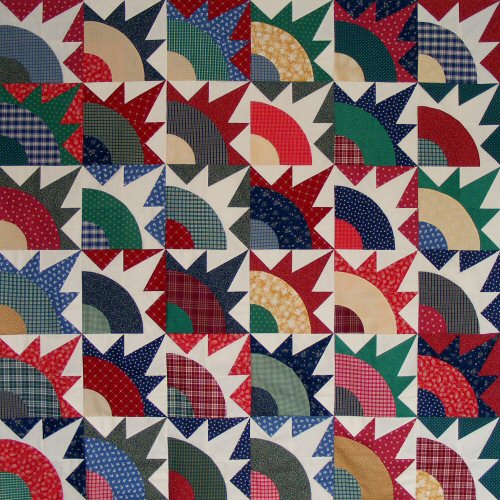
Here's the completed quilt top.
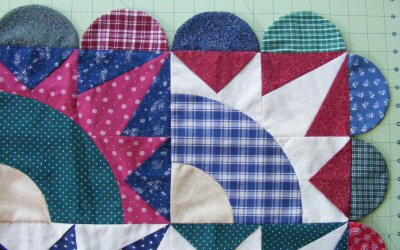
I've finished this Santa Quilt with this Scrappy Scallop edge! The instructions are available to Member's Only.
Sign Up for the newsletter to receive the notice when something new is posted. The information you send is for our files only!
|
||
|
Content & Graphics © 2001~ Victoriana Quilt Designs All rights reserved. Unauthorized use is strictly prohibited. Welcome | Victoriana Quilters | Block of the Month | Pattern Page | Library | Membership Schoolhouse | Gallery | Sharing | Feedback & Links | Card Shoppe
|