 |
|
|
|
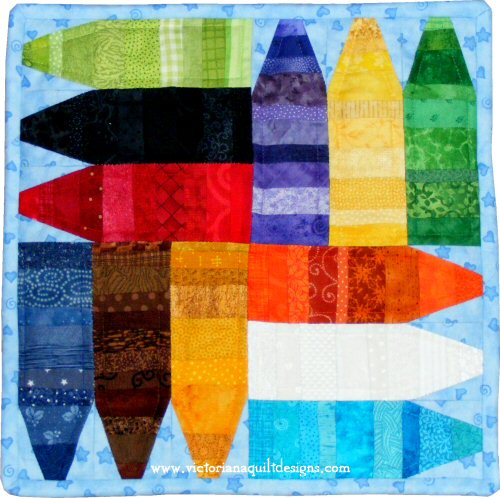
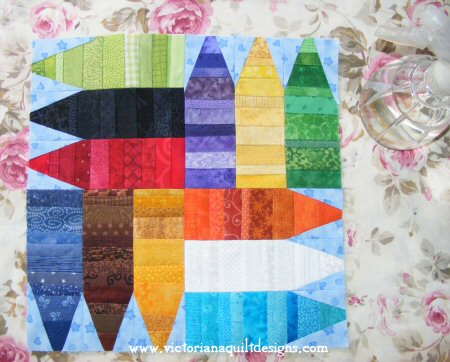
Finished Size: 12" x 12" This
design is quite flexible.
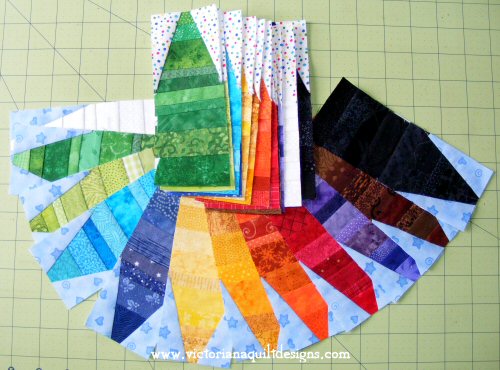
To see the Scrappy String Crayons Picture Gallery, click here.
*For
a tip about printing this page, click
here.
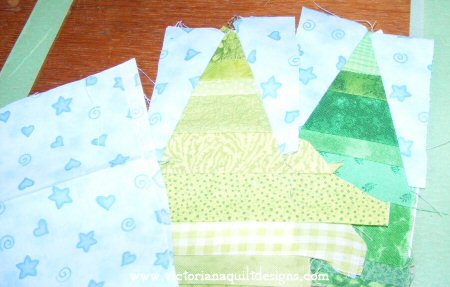
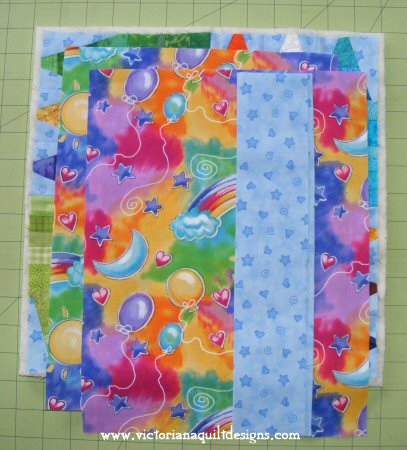
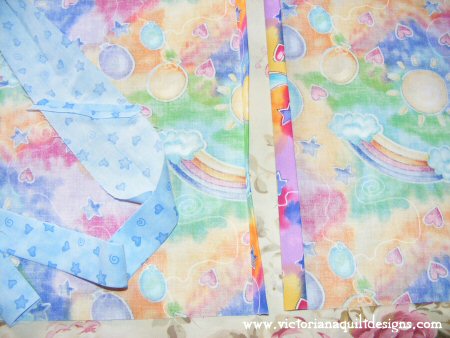
Tiny
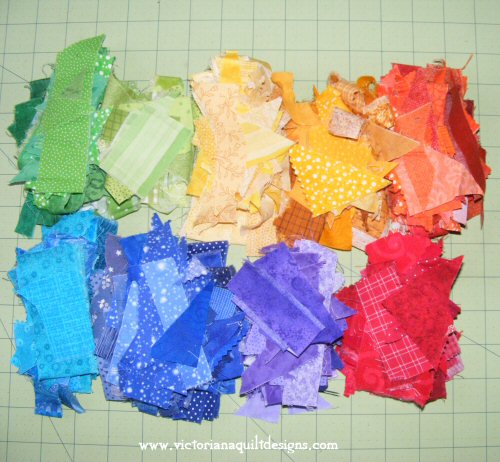
scraps of fabric in different colours
3" wide strip for the Background Fabric 14"
x 14"
Backing
Fabric
14" x 14" thin cotton batting 2 ~ 13" x 10" Fabric for the Pillow Back 1½
strips for the Binding (2½"
wide)
Tip:
In quilting a 'strip' is the width of the fabric (WOF) cut from selvage
to selvage.
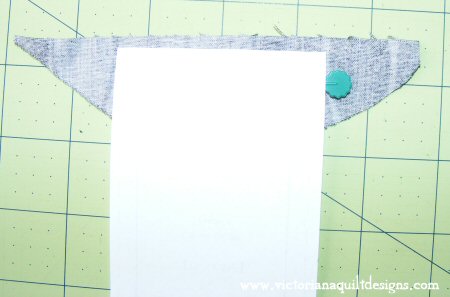
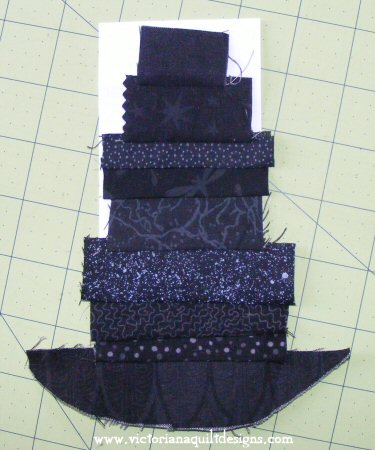
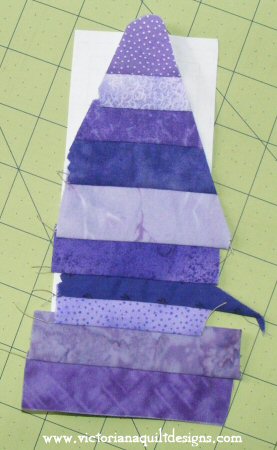
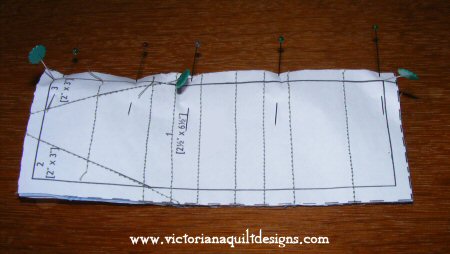
~Making the Crayon Units~ 1.
Print 4 copies of the crayon template page*. Request the Crayon Template here
*Note:
I chose paper templates for this small project, which is easy to remove
the paper. 2.
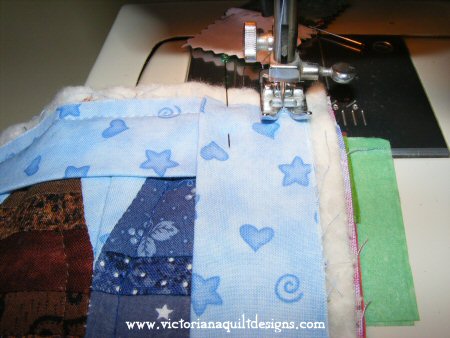
Centre the first string fabric patch, right-side up, along the bottom
edge of the crayon, on the plain side of the pattern, and pin it in
place on the printed side.
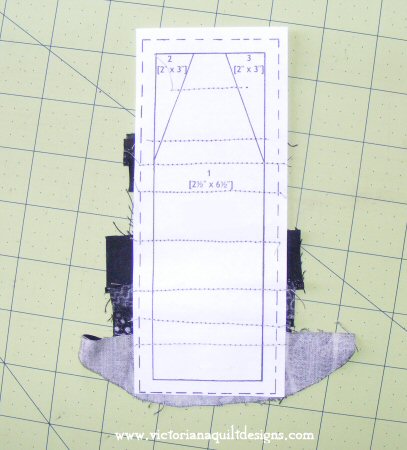
3.
Turn the unit to the sewing/printed side, with the fabric underneath. 4.
Remove the unit from the sewing machine. 5. Repeat with the next string patches until the crayon shape in the center is covered.
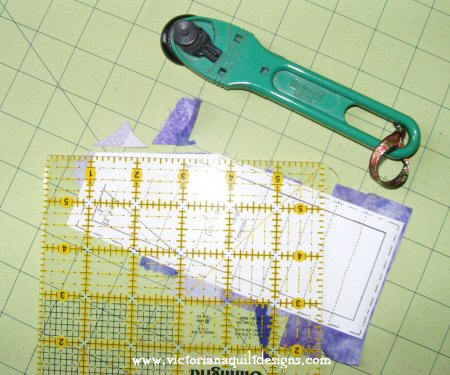
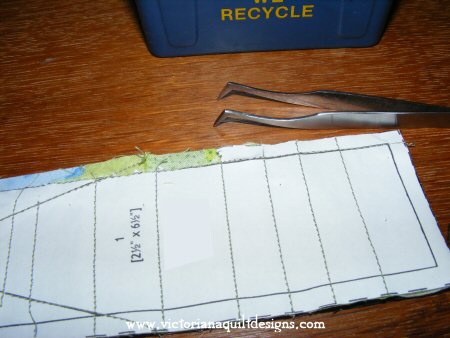
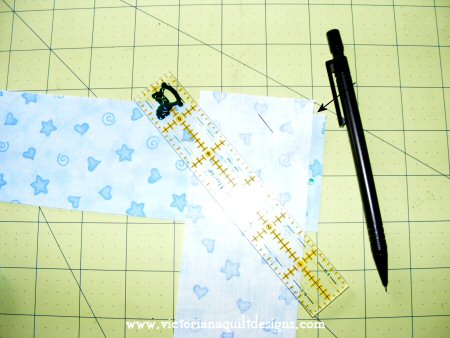
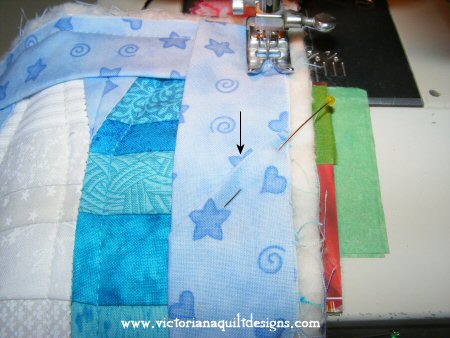
6.
Align the ¼"
line of the ruler along one of the angle lines at the top of the crayon
and fold the paper back at the edge of the ruler.
Repeat along the second angle line.
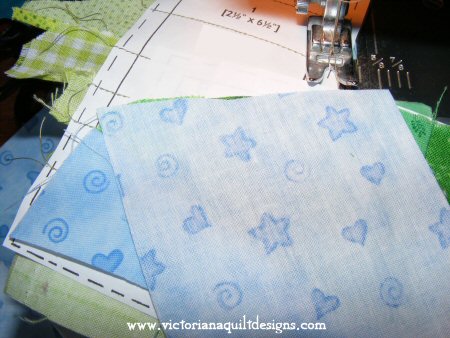
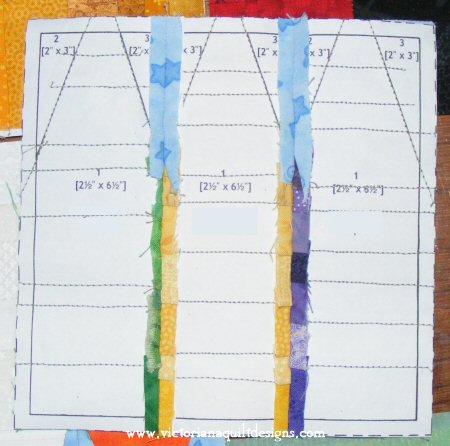
7.
Align the short edge of the 3" strip of background fabric, along
one of the trimmed edges, right-side down.
Press
the patch open, and trim the strip even with the edge of the paper.
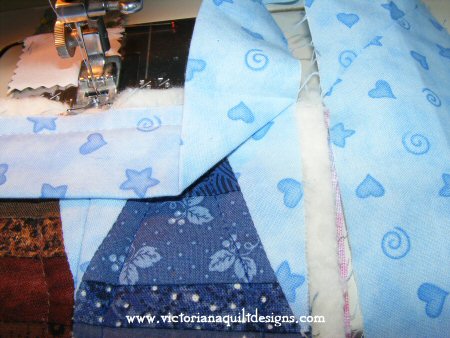
Your crayon is then complete. 8.
Using the rotary cutter and grid ruler, place the unit sewing side up
and trim the excess fabric and paper pattern along the dash line on
the pattern.
Leave
the rest of the paper in place until all the edges are joined to the
other units.
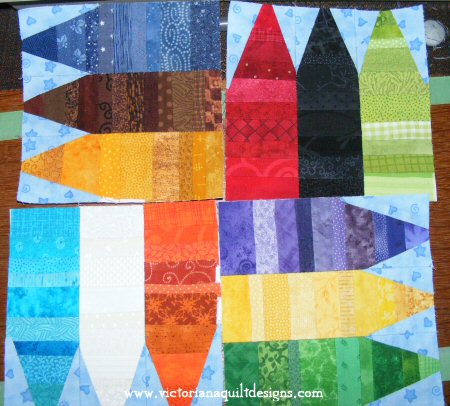
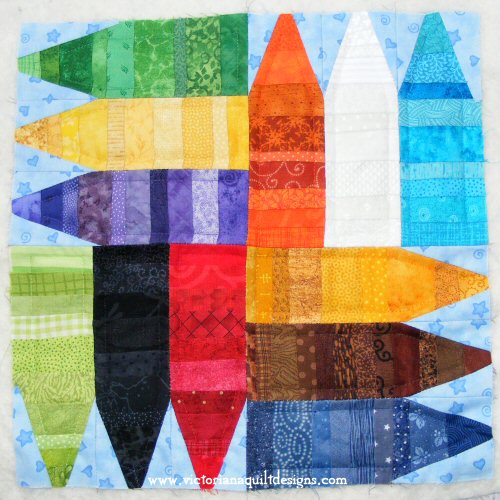
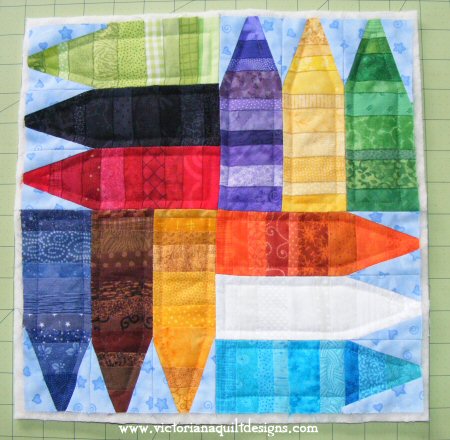
You need to make 12 crayons for the pillow.
~Sewing the Units Together~ 1.
To sew the crayons into small blocks, lay them out in an order that
pleases you.
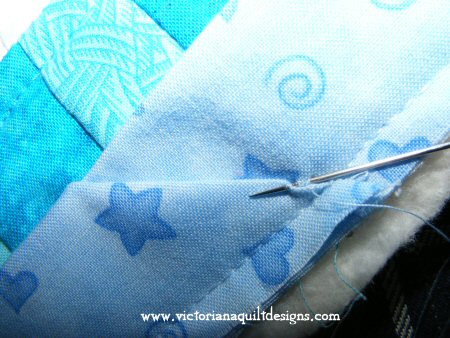
2. Stitch along the solid sewing line, from edge to edge. 3.
Fold the paper along the stitching lines an tear away the seam allowance
paper, along the perforated sewing line.
4.
When you have 3 crayon units stitched together, press the seams open.
5.
Lay out 4 small crayon blocks as shown below, or in another order you
prefer.
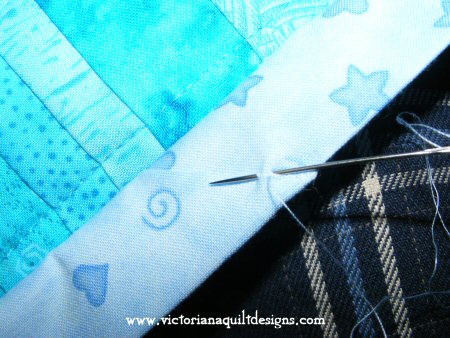
6. Now you remove all of the paper from the back of the units, with the same folding - tearing method you used for the seams.
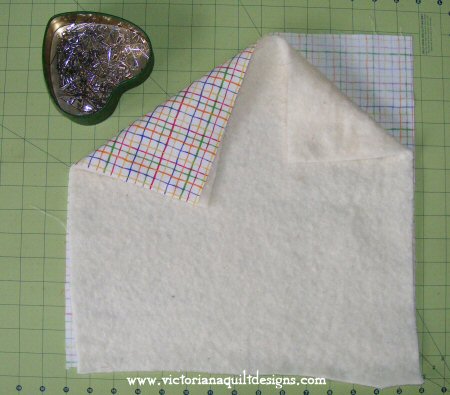
~How to Prepare & Quilt the Top~ 1.
Press [Pressing] the backing fabric and the quilt top,
one last time.
2.
On a large flat clean surface, place the backing fabric down, with the
wrong-side of the fabric facing up. Center the batting over the backing fabric and smooth out. Then
center the quilt top, with the right-side up, on top of the batting
and backing fabric.
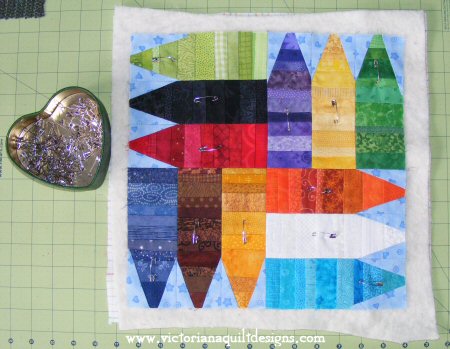
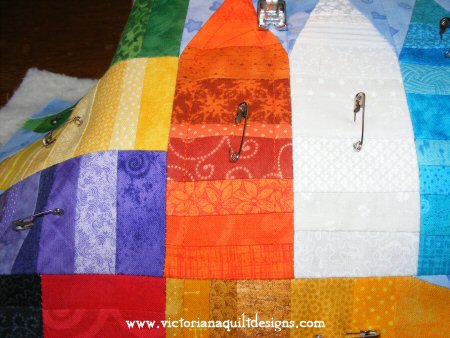
3.
Baste each crayon with a 1" rustproof safety pin.
4.
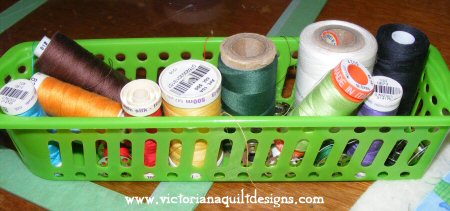
Choose the threads you will be quilting with.
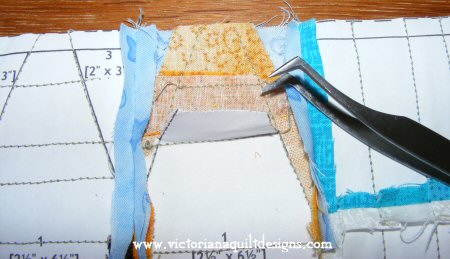
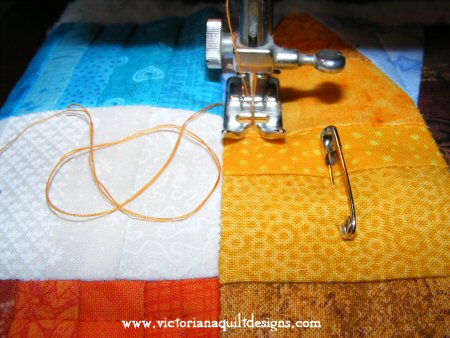
To
begin machine quilting I put my needle down in the top left side of
the crayon, as shown below, using my presser foot as a guide along the
edge of the crayon.
Quilt
down the left
side, stopping ¼"
before the end.
5. Trim the batting ¼" beyond the top, making sure the corners are square.
~Preparing the Envelope Pillow Back~ 1. Cut the two backing pieces and the binding.
2.
Prepare the pillow back pieces by turning under the raw edge ½",
along one long side of the Backing Fabric patches. Press.
3.
Lay the quilted block face down on a flat surface.
~Quilt Binding Finish~ 1.
Join the two binding strips end to end as follows:
2.
Stitch along this diagonal line.
3.
Align the raw edge of the binding with the edge of the crayon block,
beginning away from a corner. Pin in place along one side, until you reach the corner. Begin stitching the binding 3" from the end, with a few back stitches, using a ¼" seam allowance. Sew
the binding in place, until you are exactly ¼"
away from the corner of the top. 4. To mitre the corner, fold the binding back to create a diagonal fold to the corner.
Then
fold the binding back down to align the edge with the next side of the
quilt. Begin
stitching at the second fold, back-stitching to begin, and continue
to the next corner, as before.
5.
Angle the first end of the binding, trimming the extra fabric beyond
the size of a seam allowance. Stitch this remaining binding to the quilt, back-stitching both at the beginning and the end.
6.
Using a blind-stitch [Stitches·#1], stitch the
diagonal fold of the binding end closed, starting on the backside of
the fold, where the binding ends meet.
Continue on the front of the same diagonal fold.
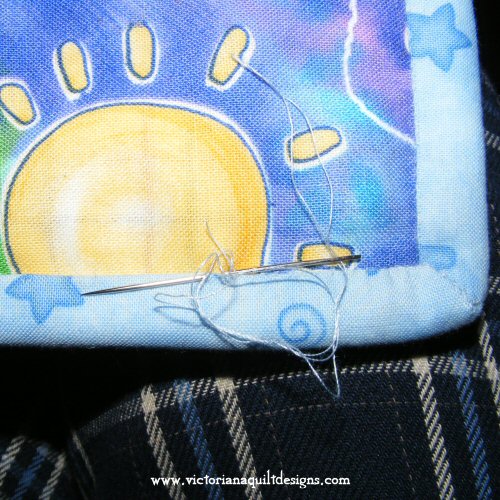
Then push your needle back to the back of your quilt (see arrow below), coming out beside the binding stitching line.
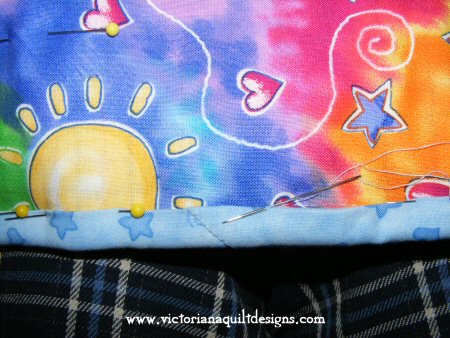
7.
Fold the binding to the back-side of the quilt, using a few pins to
hold in place, and begin stitching the binding to the back of the quilt,
just above the stitching line.
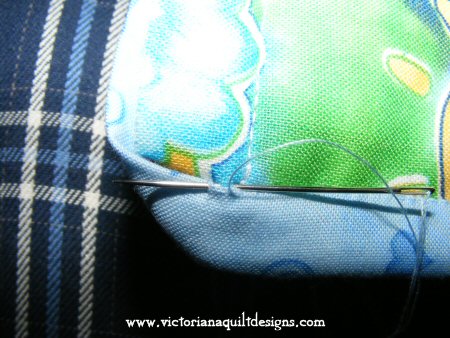
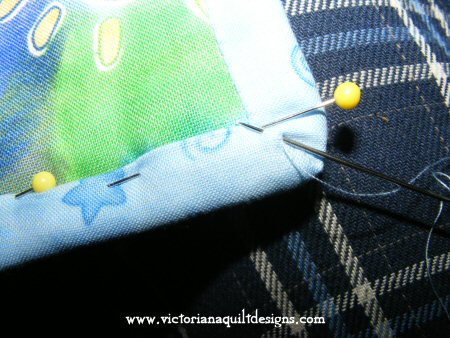
When you get to a corner take a few stitches into the seam.
Fold
the binding on the next side up, folding the corner on the back to angle
it nicely.
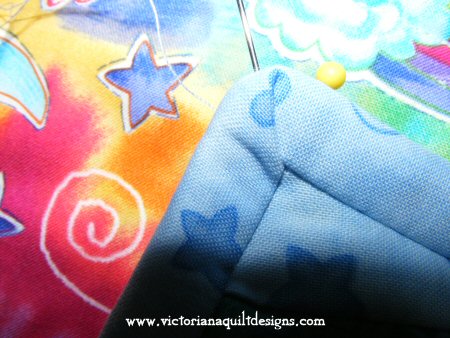
This is the front view of a mitred corner.
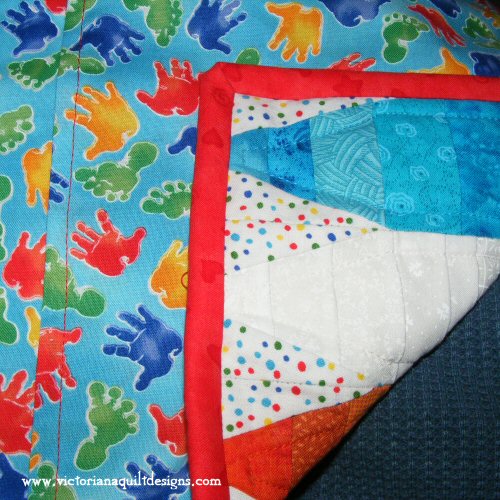
This is the finished view of the back of a mitred corner.
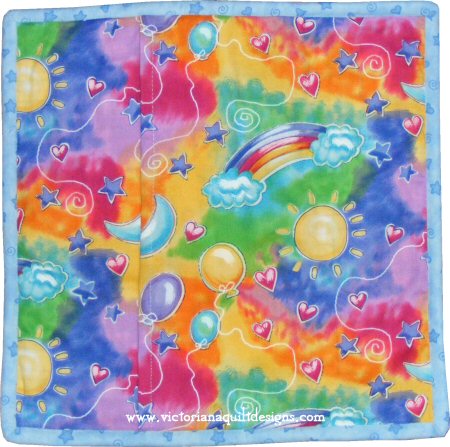
The completed back of the envelope back pillow.
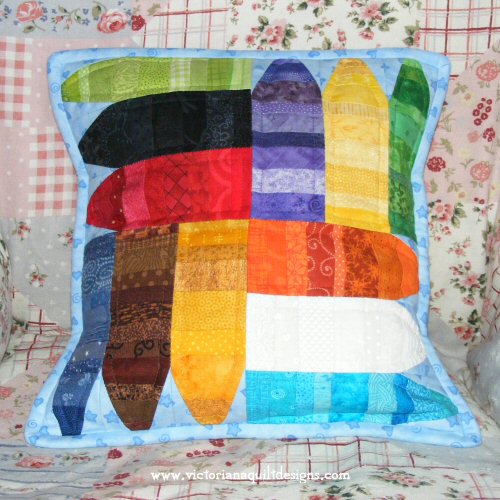
Here's the finished pillow, stuffed with pyjamas!
Here's the second pillow I made, using polka dots for the background and red binding, so the two pyjama pillows weren't exactly the same.
~Sew Fun~ Please send me pictures of any quilt projects you make with my String Crayons design! ~~~~~
Sign Up for the newsletter to receive the notice when something new is posted. The information you send is for our files only!
|
||
|
Content & Graphics © 2001~ Victoriana Quilt Designs All rights reserved. Unauthorized use is strictly prohibited. Welcome | Victoriana Quilters | Block of the Month | Pattern Page | Library | Membership Schoolhouse | Gallery | Sharing | Feedback & Links | Card Shoppe
|